Wallpaper Installation Instructions for Dummies (Part 2)
Install wallpaper on the home interior décor can increase dramatically, and it is a practical way to DIY home improvement projects. The key to success install wallpaper is a good planning and knowing the tricks to reach fine connection in every wallpaper, every detail motif used must be considered properly do not rush or recklessly. Therefore, it takes patience and thoroughness when installing wallpaper. So, in the second part article at this time will discuss how to install wallpaper perfectly like a professional!
Cutting and Install Wallpaper
1. Measure the surface to be coated, and scissors elongated the first sheet of wallpaper. Add about 12 cm for further cuts.
2. Cut several sheets again, adjust the pattern precisely with the first sheet of wallpaper. Give the numbers in sequence to avoid mistakes.
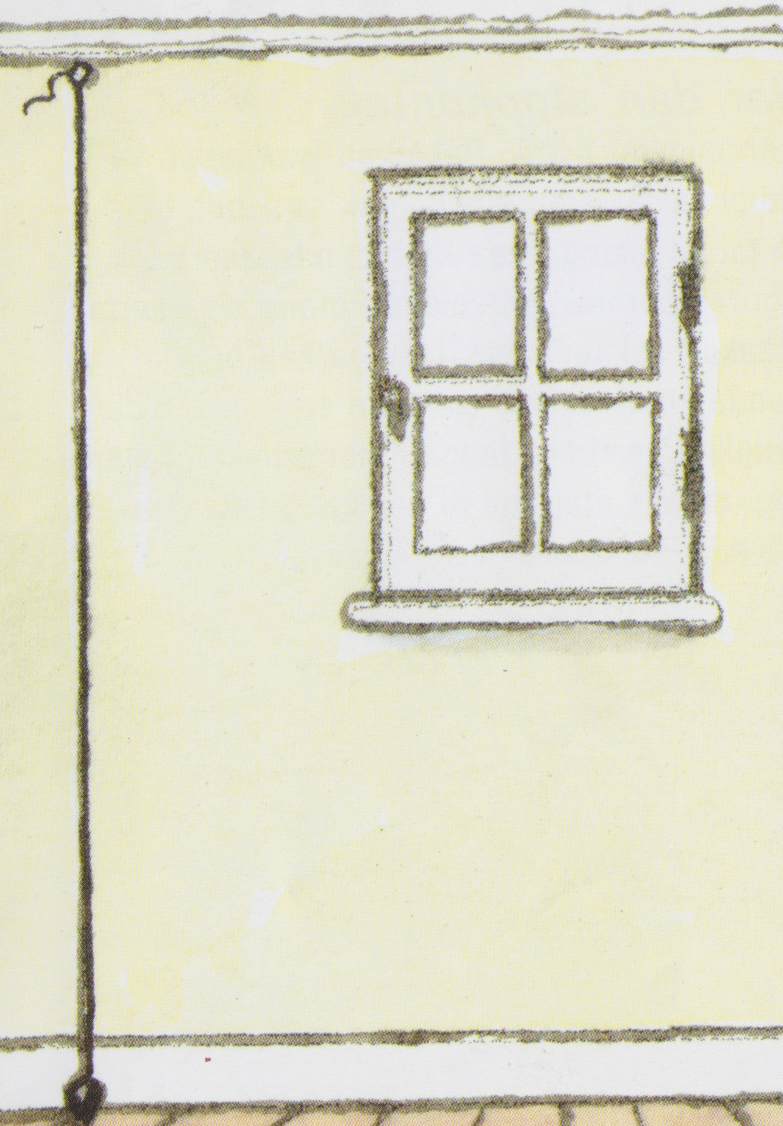
3. Use the window (not the angle) as a starting point. From the end of the window frame, measure the width of the wallpaper, subtract 12 mm and mark the walls. Hanging a plumb line to the ceiling, crossed the mark you made. Draw a vertical line with a pencil.
4. Put the wallpaper sheet face down on the table adhesive. Close the ends of wallpaper, so the table is not touched adhesive. Give ballast to prevent curled. Apply the adhesive evenly to the ends of the wallpaper. If the wallpaper is longer than the table, let it hang, while you are smearing the rest. Fold the edges of the paper to the middle, glue the sides facing each other. Let the adhesive is absorbed.
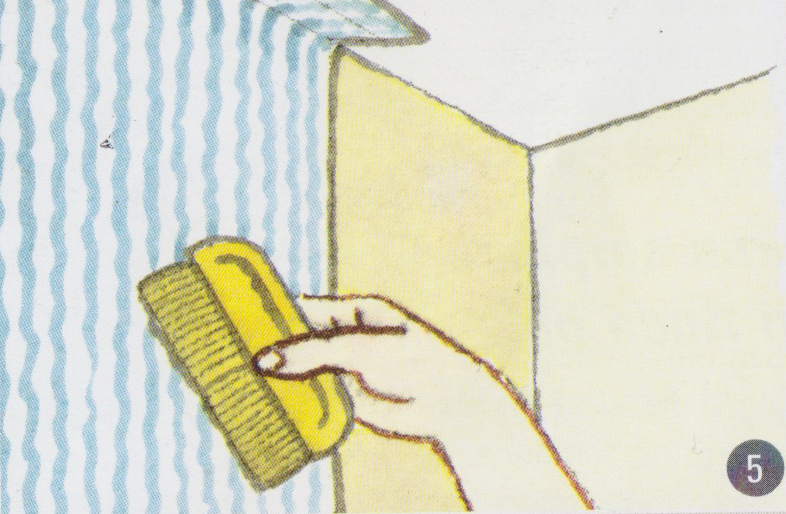
5. To install, hold the upper corner of wallpaper and unfold. Paste the top of the wallpaper on the walls, in line with the vertical line you have drawn. Flatten the surface of the wallpaper with a brush grading. Unfold the bottom and flatten towards the bottom of the wall.
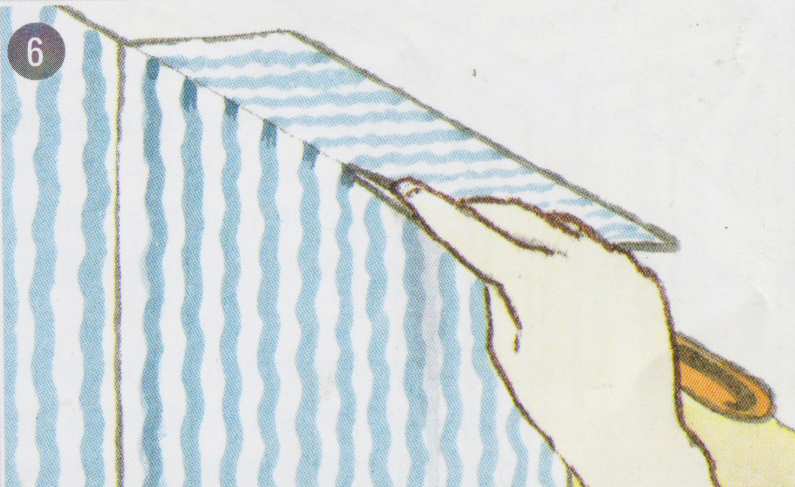
6. Press the back of scissors along the corners of the walls and ceiling. Then exfoliate the paper and cut on the fold line. Align the wallpaper back to the starting position. Do the same on the bottom wall. Check if there are air bubbles on the surface of the paper.
7. Set the next sheet meet each side (But not overlapping) with the previous sheet. Except for embossed paper, use a roller leveling connection, and move slowly on the connections.
8. Continue t0 install wallpaper with the sequence that has been described. Wallpaper that is cut lengthwise made shorter on the top of room heater. Leaving about 15-20 cm to tuck and flattened under the heating. Moving the room heater before install wallpaper is encouraged, but this can cause damage to the heating system.
9. After installed, check again to ensure neatness, especially on the connections and corners. Recheck wallpaper motif, whether the position has right directions or not. Many people realize the wallpaper motif reversed when it was installed.
[alert style=”info”]
Note: for ready adhesive wallpaper, installed in the same way. The difference, this wallpaper is not smeared with liquid adhesive, but dipped into the water according to the instructions. Remove the top end of the wallpaper first.
[/alert]
Free Bonus Tips: Install Wallpaper On the Difficult Areas
The Window Gap
Glue the wallpaper according to the sequence number in the diagram, give space for coatings overlap in the areas indicated by dotted lines. Cut a piece of wallpaper on area 3, with an overlap to insert in the back area 1 and 4.
Around the Doors
Put a full sheet of wallpaper on the wall (as if there was no door), then cut the excess paper 2-3 cm from the door frame. Make a diagonal cut in the top corner, as in the picture, and fold the rest of the paper into the frame with the rear of scissors. Peel back, trim, and smooth it back in place.
The Switch and Electrical Outlets
Turn off the power source. Put the wallpaper covering the switch or electrical outlet, and then slice a cross on the paper, making sure not to scratch the surface of the switch. Cut the rest of the paper leaving about 1 cm. Loosen the bolts on the switch box, insert the rest of the paper and tighten the bolts back. Do not insert metallic wallpaper or foil behind the switch, just cut around the sides.

Measurements must be be done accurately and precisely because if something goes wrong then the effort will be in vain
So, that is wallpaper installation instructions for dummies (part 2). Hopefully, this article can helpful for the readers. Thank you for visit our blog. Do not forget to share this article for helpful the others readers.

